
iPhone Mail Set Up
- Step 1 – Go to Settings > Mail
- Step 2 – Tap Accounts
- Step 3 – Tap Add account
- Step 4 – Tap Other
- Step 5 – Tap Add Mail Account
- Step 6 – Enter your account details
- Step 7 – Select IMAP
- Step 8 – Enter your server settings
- Step 9 – Save the account
- Step 10 – Tap the account you added
- Step 11 – Tap your account again
- Step 12 – Tap Advanced
- Step 13 – Check Mailbox behaviors
- Step 14 – Enter IMAP Path Prefix
- Step 15 – Done!
In this guide we show you how to add your email account with IMAP to the mail app on your iPhone with iOS 10 or newer.
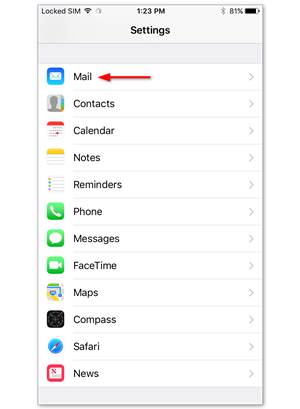
Step 1 – Go to Settings > Mail
Open Settings on your iPhone and tap Mail.
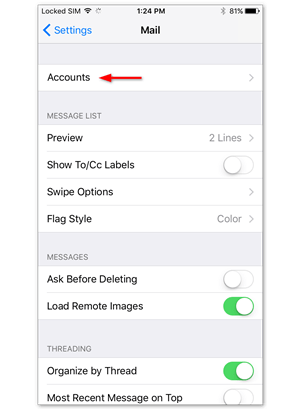
Step 2 – Tap Accounts
Tap Accounts.
Step 3 – Tap Add account
Tap Add account.

Step 4 – Tap Other
Select Other as account type.

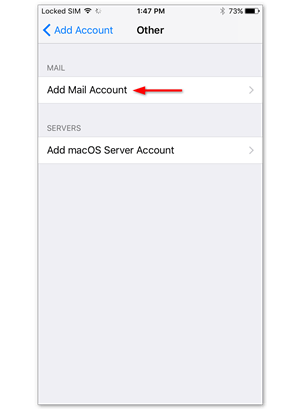
Step 5 – Tap Add Mail Account
Tap Add Mail Account.
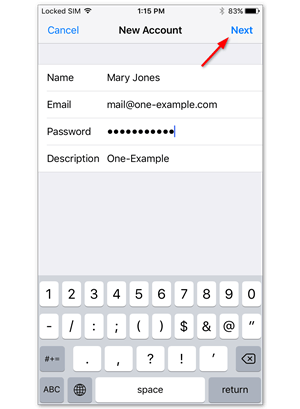
Step 6 – Enter your account details
Enter the account details for the email you want to add:
- Name: this will be visible as the sender.
- Email: the address you want to add.
- Password: you use it to log in to Webmail.
- Description: a name for the account on your device.
Tap Next to continue.
Step 7 – Select IMAP
Tap IMAP as the account type.
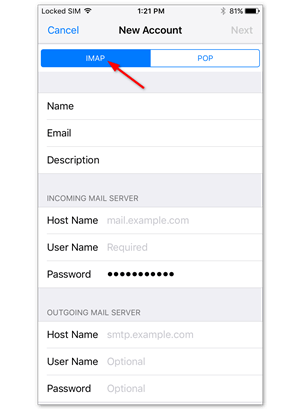
Step 8 – Enter your server settings
Enter the following settings:
Incoming server: (Refer to the welcome email I sent you)
- Host name: mail.domainname.com/net/org/info/biz
- User name: your email account
- Password: the one you use for Webmail
Outgoing server: (Refer to the welcome email I sent you)
- Host name: mail.domainname.com/net/org/info/biz
- User name: your email account
- Password: the one you use for Webmail
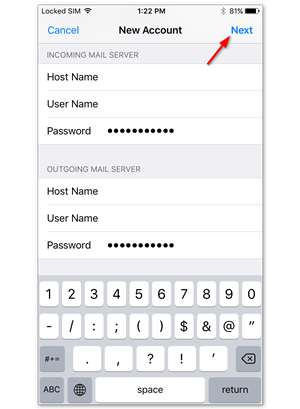
Tap Next to continue.
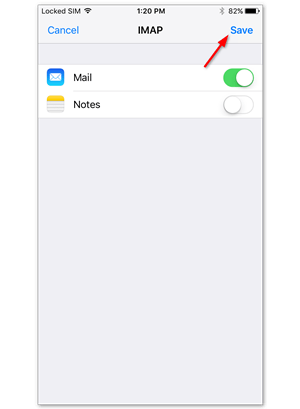
Step 9 – Save the account
Disable syncing of Notes, if this is enabled. Tap Save.
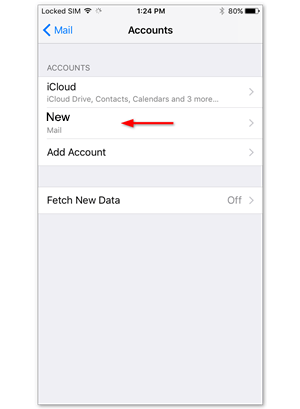
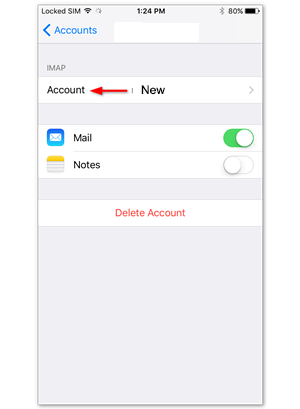
Step 10 – Tap the account you added
Tap the account you just added. You can recognize it by the description.
Step 11 – Tap your account again
Tap your account again to open settings.
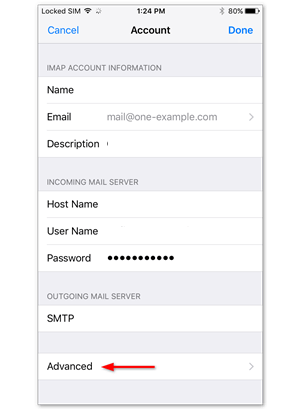
Step 12 – Tap Advanced
Tap Advanced, at the bottom of your screen.
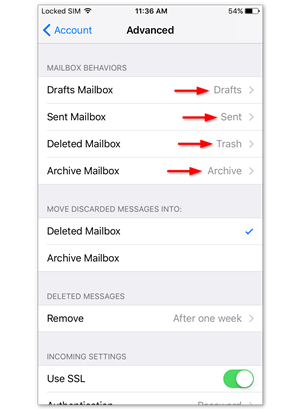
Step 13 – Check Mailbox behaviors
Check if the Mailbox behaviors are set correctly. These settings determine where your emails are saved.
You need to select the following folders on the server:
- Drafts mailbox: Drafts
- Sent mailbox: Sent
- Deleted mailbox: Trash
- Archive mailbox: Archive
If no folder, or a different one is selected, tap the mailbox and select the correct folder on the server. The name of the folder is in English.
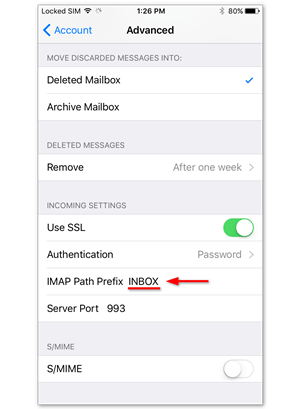
Step 14 – Enter IMAP Path Prefix
Scroll down to the bottom of the screen and enter INBOX as IMAP path prefix, all in capitals.
Step 15 – Done!
Your account is now set up correctly.